Kid-Friendly DIY: Fun and Easy Halloween Party Decor Ideas
http://www.decor-ideas.org 10/16/2015 02:13 Decor Ideas
October is here, and it’s time to prepare (or at least think about preparing) for Halloween festivities. Whether you’re hosting the neighborhood kids after school or want a fresh and inexpensive craft project to do at home in an afternoon, here are a three quick, kid-friendly ideas that give everyday items some spooky touches.
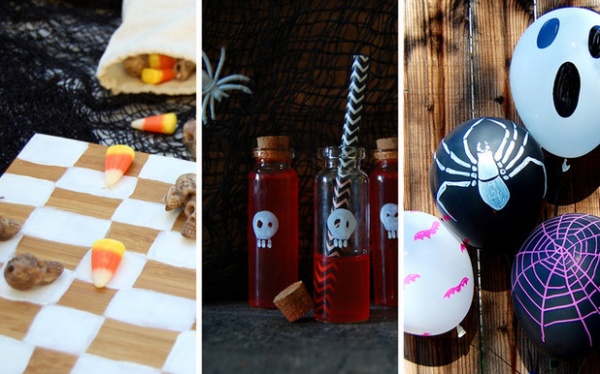
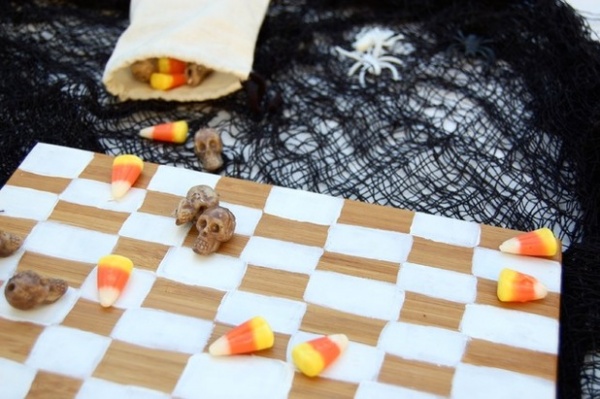
Spooky, Portable (and Edible!) Checkerboards
These two checkerboards — one made with an old cutting board, the other with a placemat — feature miniature skulls, candy corn and plastic creepy-crawlies as game pieces. Alternative game pieces include small plastic toys, wrapped candy or coins. Repurpose an old gift bag to hold the pieces to make the game easily transportable.
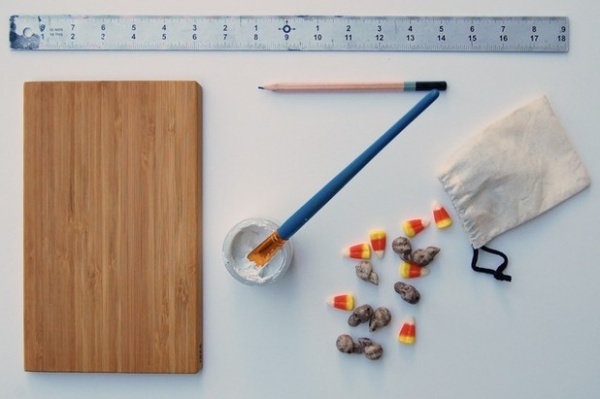
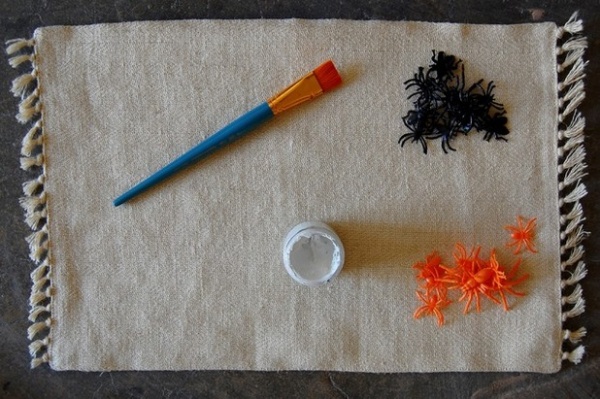
Materials and Tools
Game board surface (try a precut cutting board or plain cloth placemat)Ruler
PencilPaintPaintbrushGame piecesNote: Once you’ve painted the surface, especially on a cutting board, don’t use it with food.
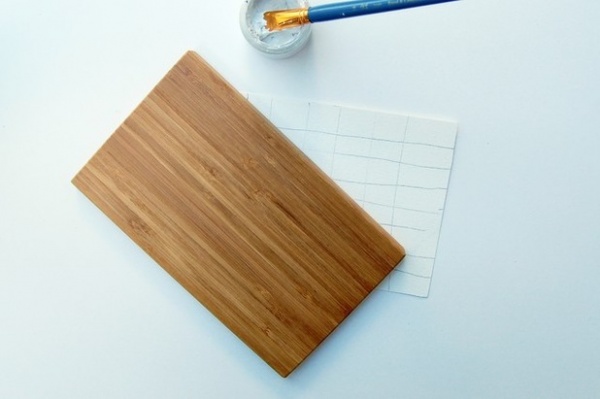
1. Thoroughly clean the surface of the board and let it dry.
You’ll need a total of 64 squares. Before painting, I cut a piece of paper the same size as the cutting board and roughed out the layout. I then transferred the rough dimensions to the board with a pencil and ruler. Keep the pencil marks light so you can easily erase any that show when you’re done.
For tic-tac-toe, simply draw two parallel lines and two perpendicular lines to create the grid.
2. Paint alternating squares, letting the board’s surface serve as the color for the other squares. I wanted a casual look, so I didn’t care if the lines were straight. For a more polished look, you might want to use painter’s tape, though it will take longer.
3. Let dry, remove any stray pencil marks and enjoy!
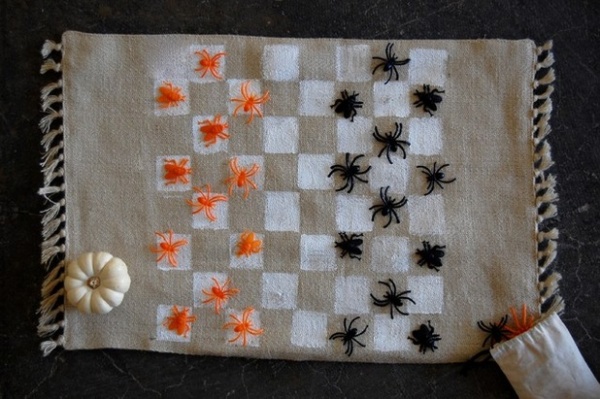
A checkerboard base made from a placemat can be rolled up and tucked away, which is great for limited space or for traveling. Here, creepy-crawly game pieces give the game an appropriately scary touch. If you are planning to add a tic-tac-toe game to the back, look for a placement with a nonporous surface so the paint won’t seep through.
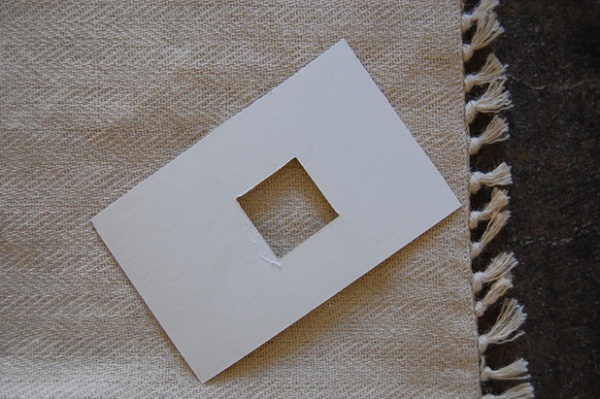
1. Lightly sketch a 12-by-12-inch square centered on the placemat to indicate the edges of the pattern. Then cut a 1½-inch square from thick paper to make a stencil.
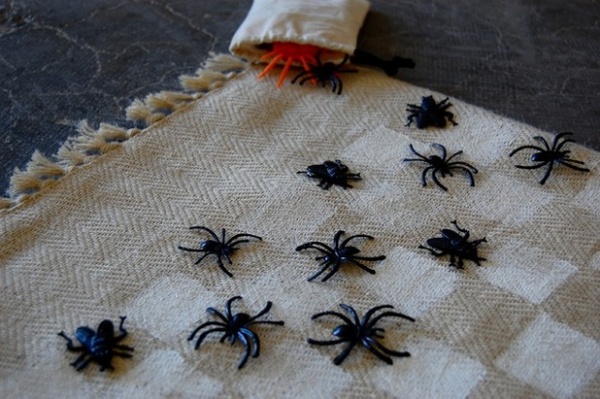
2. Starting at one edge of the square, paint every other square using the stencil as a guide. A casual and somewhat uneven square placement with uneven edges works well, especially for kids, and gives the game a more rustic feel, but you can create more precise edges with painter’s tape.
3. Once the paint has dried, gently erase any pencil marks that show.
It’s game time!
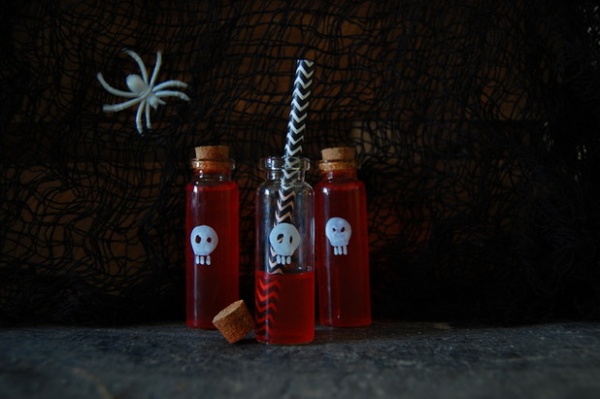
Spooky Drink Vials
Adding a Halloween-inspired design to a small vial will give you an appropriately spooky way to serve beverages.
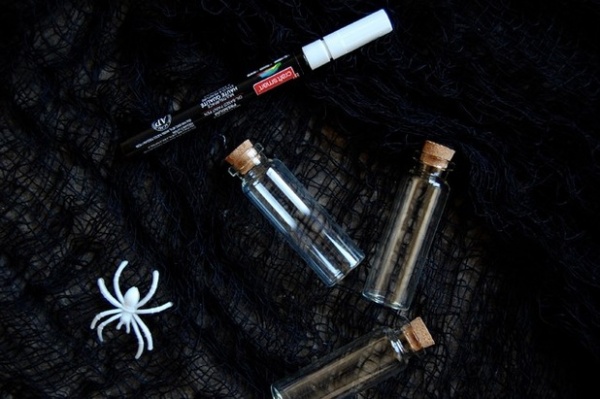
Materials and Tools
Small vials with topsPaint pens (fine tip)Beverage of choice (think red for blood or green for lab experiments)
1. Lightly draw your chosen design on the vial, then fill it in with paint. The paint dries quickly, but it’s also pretty forgiving on glass. If you slip up or aren’t happy with the final look, let the design dry completely and lightly scratch off the paint with a dull edge, such as that of a small coin. Wipe the remaining paint off with a towel and try again.
2. Carefully pour in your choice of beverage to fill the vial. I went with a fruit-punch sports drink. Water colored with food dye, dyed corn syrup or soup can also work.
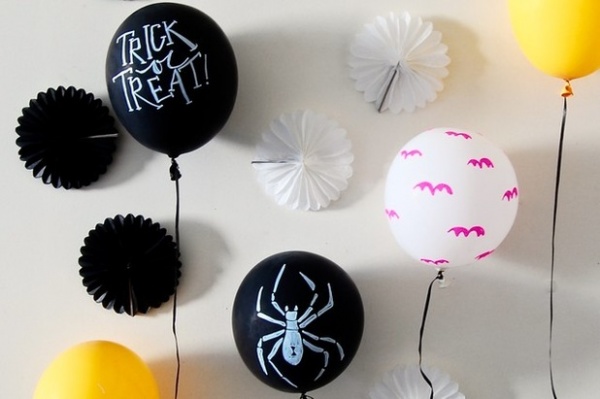
Playful Halloween Balloons
Transform plain balloons into ghosts, spiders and Halloween messages with the help of some paint pens.
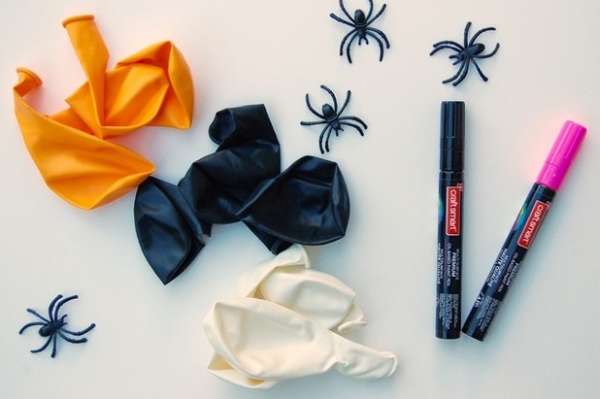
Materials and ToolsBalloonsOil-based paint pensString (black is spookiest)
1. Grab a few balloons and oil-based paint pens at a hobby or craft store. I found the black and hot-pink pens pictured here at a craft store and opted for a thick-edged tip.
I was able to color roughly five to six balloons per pen before running low on paint. If you want to cover the balloons completely or have a large number of balloons to decorate, have a few more pens on hand.
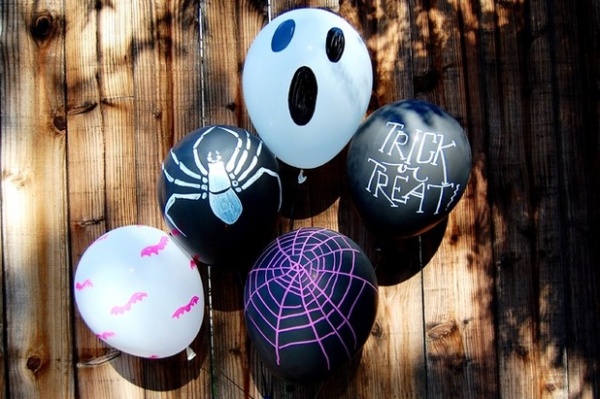
2. Blow up the balloons, tie hem off and start painting. For a fun mix, include one or two of each of the following: texts and messages, patterns such as a spider web and festive icons such a spider or a ghost face.
3. Once the paint has dried, add the string.
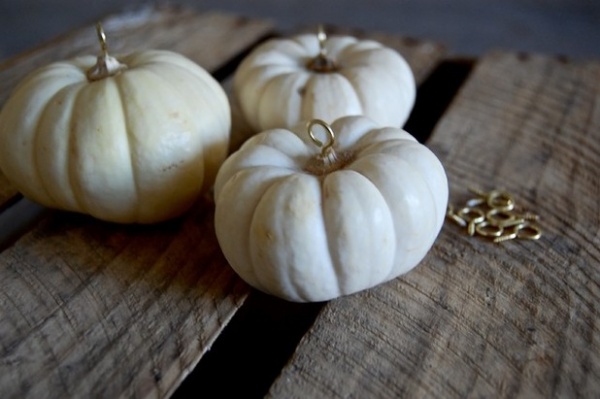
4. If you’re adding helium to your balloons and don’t want them to escape, or simply want to create a balloon centerpiece, use pumpkins as bases. Attach small screw eyes to the stems (if the stems are too tall, cut them down with a small, ridged knife). Tie the strings on your balloons to the screws.
Make these balloons the day of your party, because they will deflate quickly.
Tell us: Are you hosting a Halloween party this year with DIY decorations? Share a photo and tell us about them in the Comments below.
More
Low-Boo Halloween Decor for the Little Ones
7 Quick and Easy Indoor Halloween Decorating Ideas
Easy Halloween Decorations From Stuff You Already Have
Related Articles Recommended
Related Images Recommend