How to Shape a Rain Garden and Create the Right Soil for It
http://www.decor-ideas.org 09/24/2015 05:13 Decor Ideas
A rain garden is a beautiful addition to the home landscape and is a sustainable way to return rainwater from your roof, or other impervious surfaces, back to the aquifer. Instead of sending water downstream through storm drains, rain gardens drain the water onsite, cleansing it as it infiltrates the soil.
First, determine how to site and size a rain garden in your yard, and then learn how to shape your rain garden and create the right soil mix.
Why the soil matters. Rain gardens function by allowing water to slowly infiltrate the soil instead of running off into city storm drains or contributing to flooding on a property. They act like shallow, permeable containers that drain water through their flat bottom and back into the soil. The soil, therefore, is the true foundation of how the rain garden functions.
The soil has to be graded, or shaped, so it can act like a container, and the soil has to have the right composition for the water to slowly infiltrate it. Once the soil foundation is set, plants will help maintain the soil function over time.
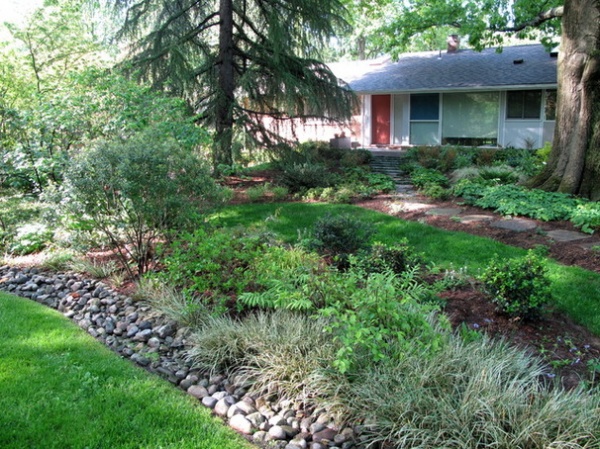
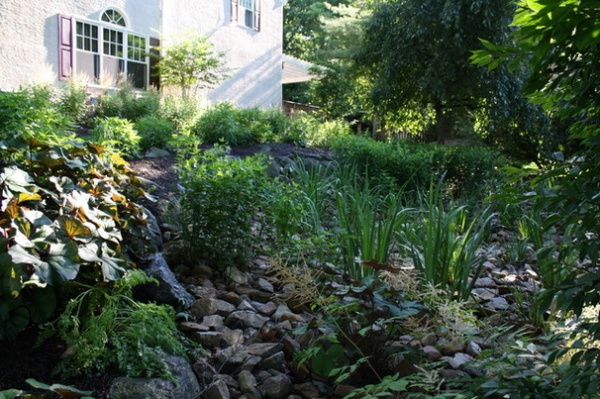
Shown: A rain garden collecting runoff from a home in the Washington, D.C., metro area
1. Test the existing soil’s infiltration rate. Once you have chosen your rain garden location, test the existing soil’s infiltration rate. The existing soil infiltration rate plays a part in how you create your soil mix for the rain garden. You can do an infiltration test yourself (or hire a landscape contractor to do one for you):
Dig a hole at least 1 foot deep at your intended rain garden location.Fill the hole with water to fully saturate the soil at the base, and let it sit for 45 minutes. Refill the hole completely with water and observe for 48 hours.If the water completely drains within 48 hours, your existing soil’s infiltration rate is adequate. If the water does not drain within 48 hours, you will need to excavate the existing soil and provide subdrainage to ensure that the water flows out of the rain garden, or consider an alternate location for your rain garden.
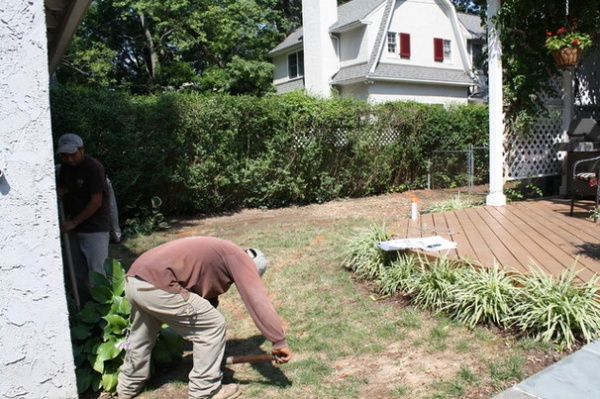
2. Lay out the shape. Before you or a contractor starts digging, you must call your local utility authority and have someone come out and flag the utility lines on your property so that you don’t install your rain garden directly over them.
Mark your garden’s layout with spray paint — choose a nontoxic spray paint that’s low in volatile organic compounds. This is the easiest way to visualize the rain garden’s shape in your landscape at full scale. Another method is to use a length of rope and stake it in place.
Shown: Orange spray paint lines mark the outline of a rain garden as the landscape field staff begin to dig.
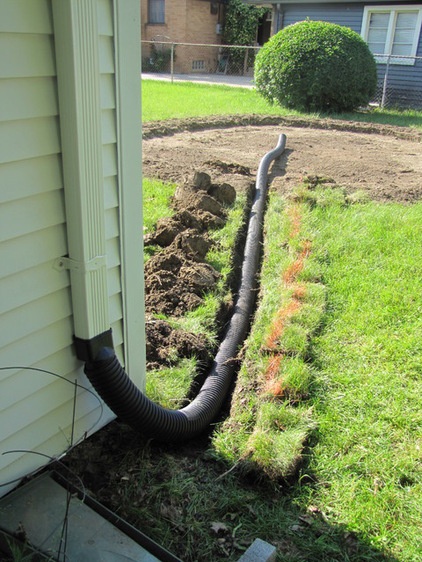
3. Set your inflow and overflow points. The water you want to direct into your rain garden can be moved from a nonpervious, or impervious, surface via a rock or vegetated swale or an underground pipe. In the landscape here, a drainpipe connects directly to the roof downspout and leads downhill to a flattened rain garden area.
A swale moves water across the ground’s surface and can be part of an integrated swale and rain garden design. Keep in mind that a swale collects additional water as it carries your intended water to the rain garden, adding to the water volume the rain garden will need to accommodate.
The inflow source, where the water enters the rain garden via a swale or an underground pipe, should be located higher than the overflow point, which is a small outlet that allows excess water to escape during big rain events, set at the top of the ponding depth of the rain garden (see diagram below).
How to Move Water Through Your Landscape

Shown: Section of a rain garden’s soil layers and water flows
4. Excavate and amend. Rain gardens slowly drain rainwater and should not hold water for more than 48 hours. Therefore, it’s critical that the soil mix in the rain garden allows for adequate infiltration. If your existing soil did not perform well in your infiltration rate test, here are two approaches to creating the correct soil mix.
Completely remove the existing soil to a depth of 18 to 24 inches and replace it with a bioretention mix of compost and sand. This method is necessary if your existing soil has a very poor infiltration rate (based on the soil infiltration test explained earlier in this article). If your existing soil has poor infiltration, it’s also a good measure to install subdrainage below your rain garden. Amend the existing soil with compost and sand. This is the more common and less expensive method.Whichever method you use, the base of the rain garden should be 4 to 8 inches below the surrounding ground, and the amended soil should go 1 foot to 2 feet below that.
5. Grade the rain garden. Grading is the process of contouring and sloping the ground so that water moves across it. The rain garden should function like a shallow, wide container with a porous bottom. Use this checklist to ensure that your rain garden is graded correctly.
Flat base: The rain garden needs a flat, level base so that water can drain evenly. Use a level to check that your rain garden’s base is flat.Containment: On sloped sites create a berm on the low edge of the rain garden, if needed; the berm creates a ridge around the lower side of the rain garden so that the water will be contained and less likely to splash over. Sloped sides: The sides of the rain garden should have a 2:1 slope; for every 2 inches of run, the side should rise 1 inch.
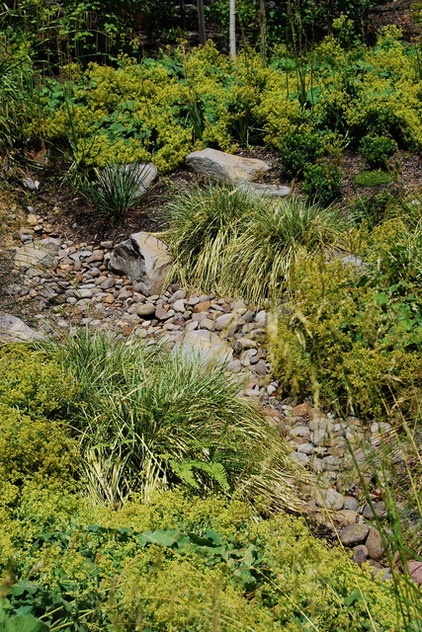
Shown: The grading eventually blends into the surrounding landscape as the plants mature.
6. Get the right soil amendments. Rain garden soils act like sponges that soak up water while also letting the water pass through to the native soil layers below the rain garden. In order to do this, they need to have a mixture of high organic content and sand to improve the coarseness and texture of the soil. For rain gardens, the ideal soil mix is 35 to 40 percent compost and 60 to 65 percent coarse sand. Once you have created the proper mix of soil for the rain garden, it is not necessary to continuously add these amendments.
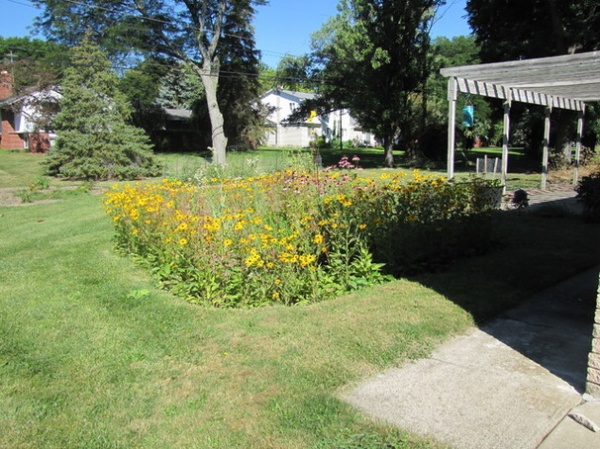
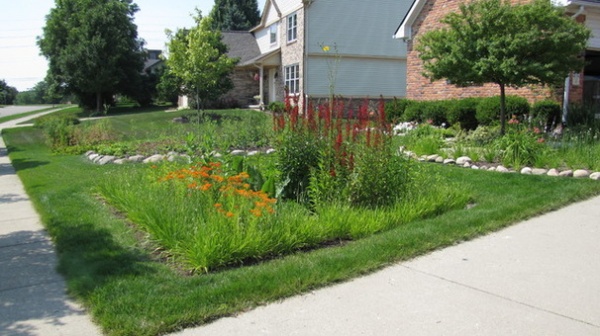
Shown: A front-yard rain garden with mature plants
Photo by the Wisconsin Department of Natural Resources
Next: How to choose plants for your rain garden
More
To Manage Stormwater Sustainably, Understand Your Site
Stormwater Planters Manage Runoff in Small Gardens
More guides to landscape design
Related Articles Recommended
Related Images Recommend