Neat Little Project: Build an All-in-One Storage Seat
http://www.decor-ideas.org 07/22/2013 02:40 Decor Ideas
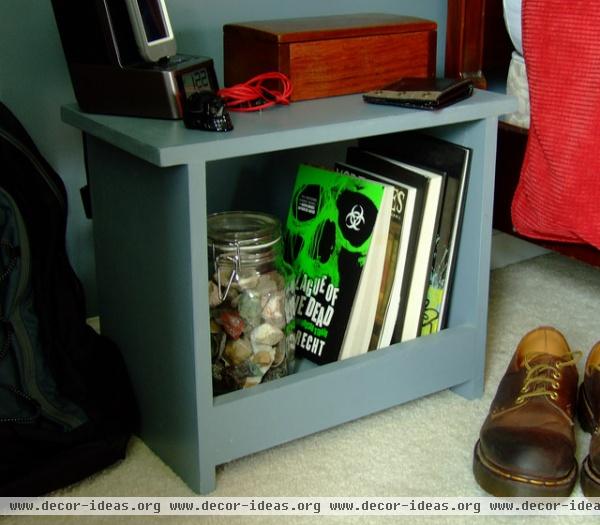
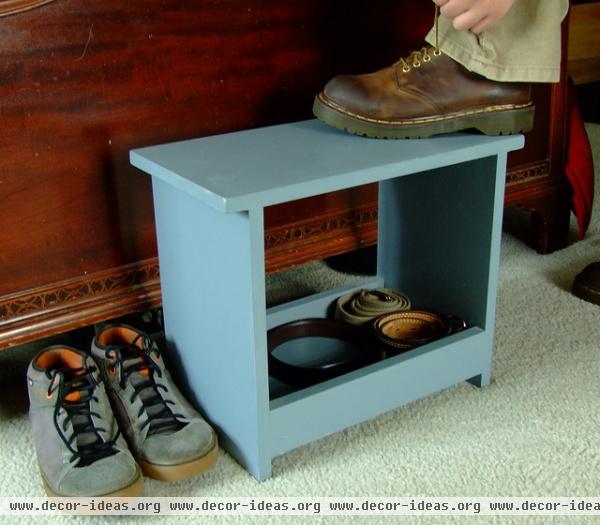
When building something for a kids' room, consider how long they might use it. You and the recipient will get a lot more enjoyment and use out of something that can withstand the transitions from one age to the next. This multipurpose wooden seat can be used from childhood through the teen years as a small side table, nightstand, small seat and step stool, and as storage.
This easy-to build piece measures 18 inches long, 9¼ inches deep and 14¾ inches high. It's slightly shorter than a traditional 18-inch-high seat and a bit taller than many step stools.
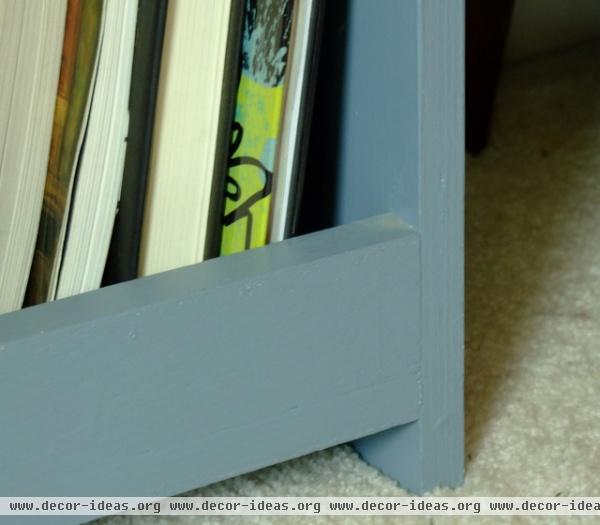
The bottom storage area measures 14 inches long, 7¾ inches wide and 2½ inches deep. It can hold a variety of objects, such as the books and large jar you see here.
The top is large enough to hold a small lamp and other items.
Tools
You'll need a handsaw, miter saw or circular saw for cutting the parts, a pair of 18-inch or larger clamps and a hammer.
If you have only a jigsaw, you can make the cuts for this project, but make sure you've got a secured straightedge to use as a guide when doing so.
Materials 1-by-3-by-4 board 1-by-10-by-6 board 4d finish nails (28)For a painted version, use something like poplar or alder. For a stained version, go with something like oak.
Pick up a box of 4d finish nails unless you have enough in your supplies already. You can use #16 by 1½-inch brads if you happen to have those instead.
You'll also need some wood glue, primer and paint (or stain and polyurethane). And course paintbrushes and rags.
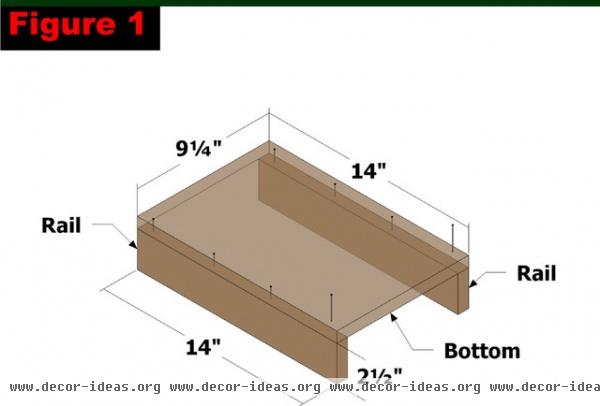
Create the bottom (rail assembly). Cut two pieces of the 1-by-3 to 14 inches long — these are the rails. Cut one piece of the 1-by-10 to 14 inches long — this is the bottom. Apply glue to one edge of the rails and position them as shown in Figure 1 so they are flush with the edges of the bottom. Clamp everything in place and hammer four nails or brads through the bottom and into each rail.
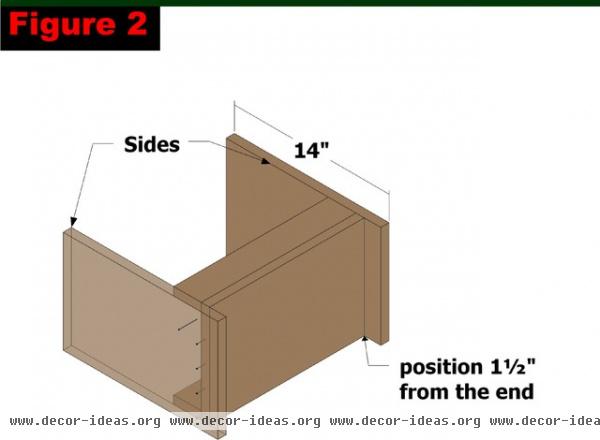
Attach the bottom to the sides. Cut two pieces of 1-by-10 to 14 inches long — these are the sides. Apply glue to the ends of the bottom and rails, and position the assembly as shown in Figure 2, making sure that the bottom is 1½ inches from the ends of the sides. Clamp everything together and hammer five nails or brads through the sides and into the bottom.

Attach the top. Cut one final piece of the 1-by-10 to 18 inches long — this will be the top. Apply glue to the ends of the sides farthest away from the bottom and position the top as shown in Figure 3. Clamp everything together and hammer five nails or brads through the top and into each side.
Add the finishing touches. Sand the entire piece, especially any rough corners and edges. If you're planning to paint it, apply two coats of primer. Sand between coats after the primer has dried. Apply two coats of paint.
If you'll be staining the piece instead, apply stain for the desired time, wipe off the excess and allow the piece to dry before applying a top coat of polyurethane. You can also mimic a stain with a DIY color wash.
Lightly rub the first dry coat of polyurethane with fine-grit sandpaper (220) or steel wool, and wipe off any residue before applying any subsequent coats.
More: Browse more DIYs
Related Articles Recommended
Related Images Recommend