Neat Little Project: Make a Sturdy Stand for Tablets and Books
http://www.decor-ideas.org 07/21/2013 22:05 Decor Ideas
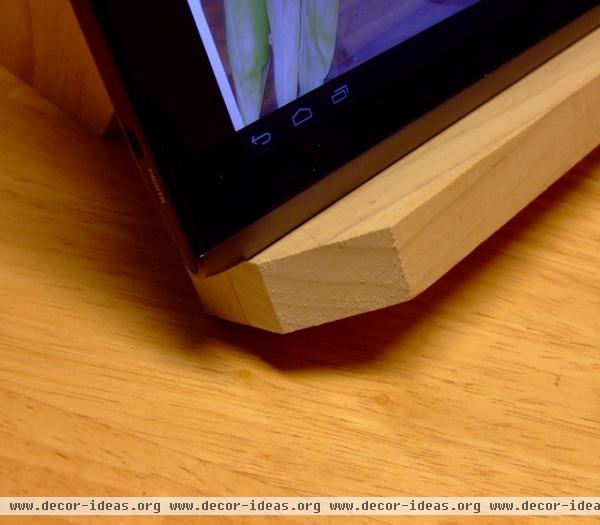
Tablet computers, no matter the size or brand, are becoming ubiquitous and indispensable tools for entertainment, research and project how-tos. The kitchen is a prime example of a spot where it can be vital to see how to do something exactly as it should be done. That's where this stand comes in.
Sure, cover-stand combinations can be purchased online, but it's ideal to have something you know is sturdy and is at a good angle for viewing. And as all cooks know, there's some pride in making something with your own hands.
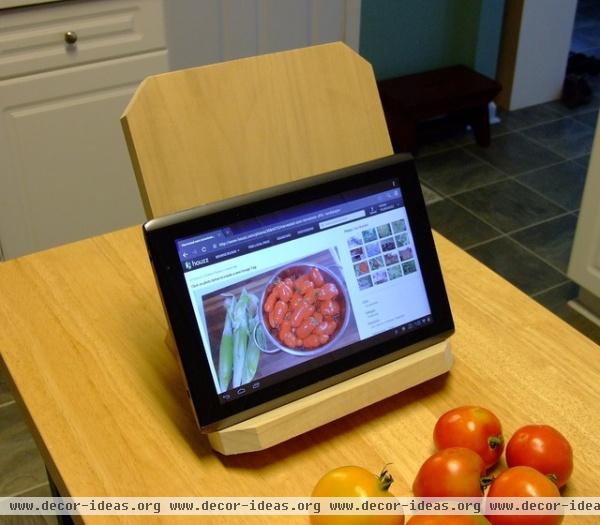
And, if you're still old school when it comes to reference materials, you can place a cookbook on this stand for the same effect.
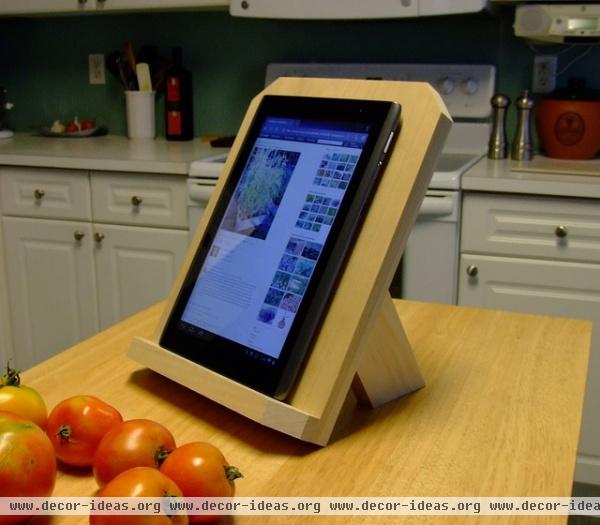
Measuring 12 inches long (a little more than 10 inches high at the angle shown), 9¼ inches wide and roughly 8 inches deep, this stand can fit on a small space in the kitchen or on a desk.
It can accommodate 10-inch tablets both vertically and horizontally, in addition to the 7-inch versions. Plus, you can switch in a book or even a printout of a recipe if needed.
Tools
Handsaw, miter saw or circular saw for cutting the partsPair of 18-inch or larger clampsHammer
Materials1-by-2-by-2 board 1-by-3-by-2 board1-by-10-by-2 board4d finish nails (9)#16 by 1¼-inch brads (3)For a painted version, use something like poplar or alder. For a stained version, go with something like oak. You can use #16 by 1½-inch brads instead of the ones listed above. You'll also need some wood glue, primer and paint (or stain and polyurethane), paintbrushes and rags.
The stand you see here has been left natural and is made of poplar.
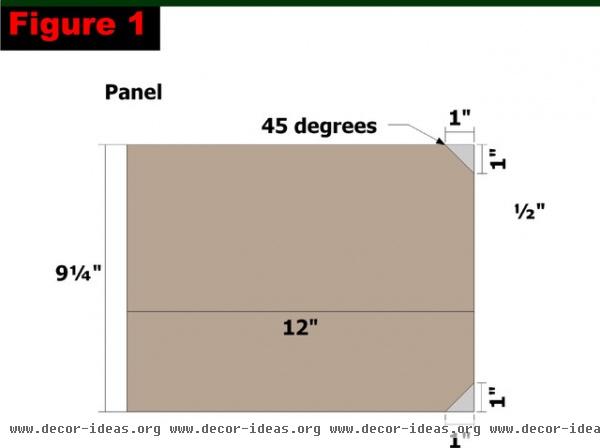
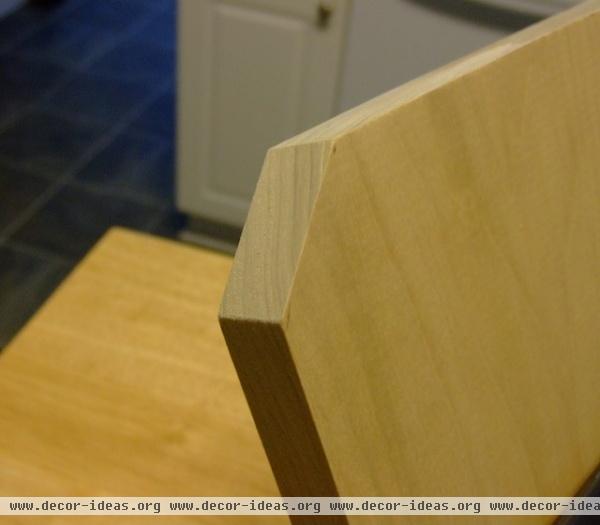
Cut the panel to 12 inches long from the 1-by-10. Use Figure 1 as a guide for cutting 45-degree miters on two corners. This will be the top end of the panel.
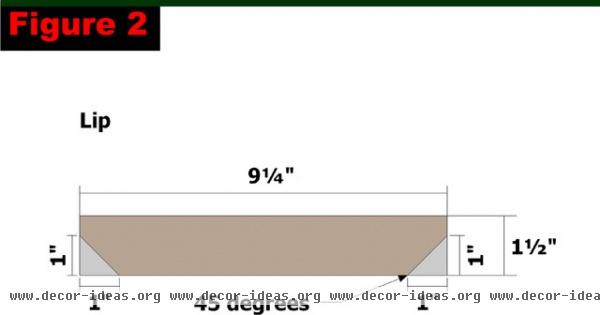
Cut the lip from the 1-by-2 to 9¼ inches long and use Figure 2 as a guide for cutting 45-degree miters on two corners.
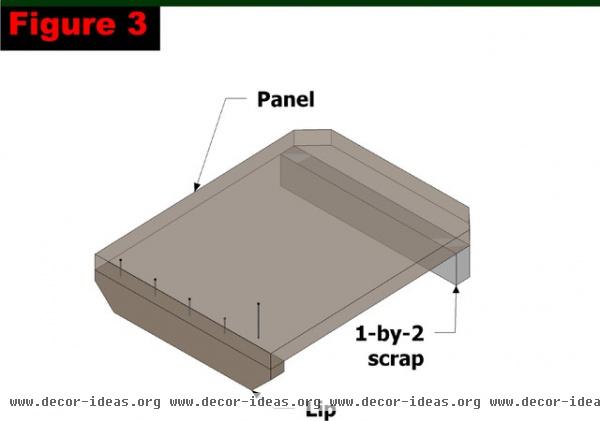
Position the panel and lip as shown in Figure 3. Use the remaining part of the 1-by-2 as a spacer when positioning the panel. Apply glue to the edge without the miter cuts on the lip. Attach it using 4d finish nails. Clamping the parts in place will make this step easier.
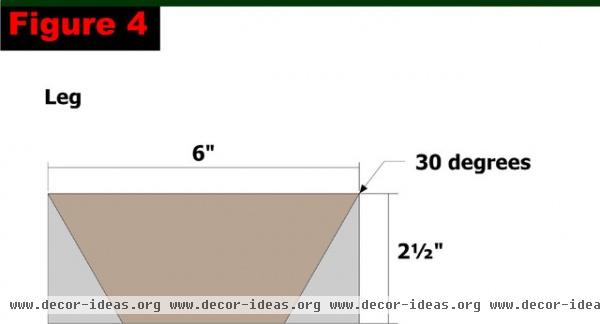
From the 1-by-3, cut two legs using Figure 4 as a guide. Cut each part one at a time, making sure to keep the long part of the board farthest away from the saw.
The angle on these legs is 30 degrees. You can adjust as needed, but keep in mind that the lower the angle, the more vertical the holder will stand.
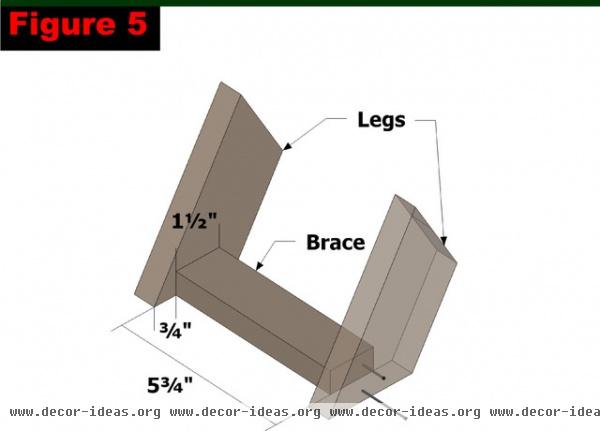
From the remaining piece of 1-by-2, cut the brace to 5¾ inches long. Use Figure 5 as a guide for positioning the brace ¾ inch from one of the long points on the legs. Be sure to apply glue to the ends of the brace. Clamp everything in place and attach the brace using 4d nails.
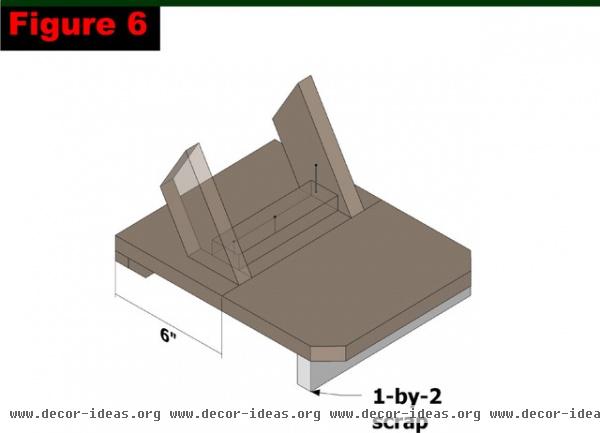
Position the brace and leg assembly as shown in Figure 6, 6 inches from the end of the panel with the lip attached. Apply glue to the face of the brace and the ends of the legs and attach them using #16 by 1¼-inch brads.
Sand any rough edges and corners as desired. You can adjust the side of the project to meet specific size needs by changing the dimensions of the panel and the lip. Just make sure to match the lip to the width of the panel.
You can also add a piece of molding or a square dowel to the top face of the lip. Just keep in mind that this will limit the thickness of the tablet or book that can fit on the stand.
More:
Turn Your Kitchen Counter Into a Touch Screen
Why Your Kitchen Wants Its Own iPad
Related Articles Recommended
Related Images Recommend